An Introduction to Flash Photography
Introduction
The flash is one of the most important tools in the history of photography. From the earliest days of the medium to the present, it has given photographers the ability to control and shape light, profoundly influencing the mood, aesthetics, and final outcome of an image.
Despite its many advantages, using flash is not always easy, especially for those taking their first steps in photography. Making effective use of it requires an understanding of basic technical concepts and lighting principles, as well as familiarity with the way light interacts with the subject and its surroundings. However, this knowledge is highly rewarding, as it enables photographers to create images that would be difficult—or even impossible—to achieve using available light alone.
This is the first in a series of blog posts aimed at presenting the fundamental principles of flash photography in a clear and accessible way, helping photographers take their first steps into one of the most creative areas of the craft.
In this introductory article, we will provide a brief overview of how a flash works and examine the different types available. We will outline their role and usefulness in photography, as well as some of the challenges involved in using them effectively. In the posts that follow, we will explore flash features, technical specifications, and key terminology in greater detail.
Flash Units in Photography
Camera flash units are devices that produce artificial, instantaneous illumination in the form of a very brief and powerful burst of light. The duration of this burst can be extremely short. For example, with the Godox TT685, depending on the selected power setting, the flash duration ranges from approximately 1/300 to 1/20,000 of a second.
Depending on the model and intended use, flash units can be mounted directly on the camera via the hot shoe or used off-camera, positioned on a light stand or other support and triggered wirelessly.
In this blog post, I will use examples from flash equipment that I personally own and use, specifically several Godox models for the Fujifilm system. This choice is made purely for practical reasons and not for promotional purposes, as these are products with which I have extensive hands-on experience. The operating principles and techniques discussed are not limited to these particular models. Similar flash units with comparable capabilities are available from many other manufacturers, meaning that the information and methods presented here can be applied across a wide range of photographic equipment.
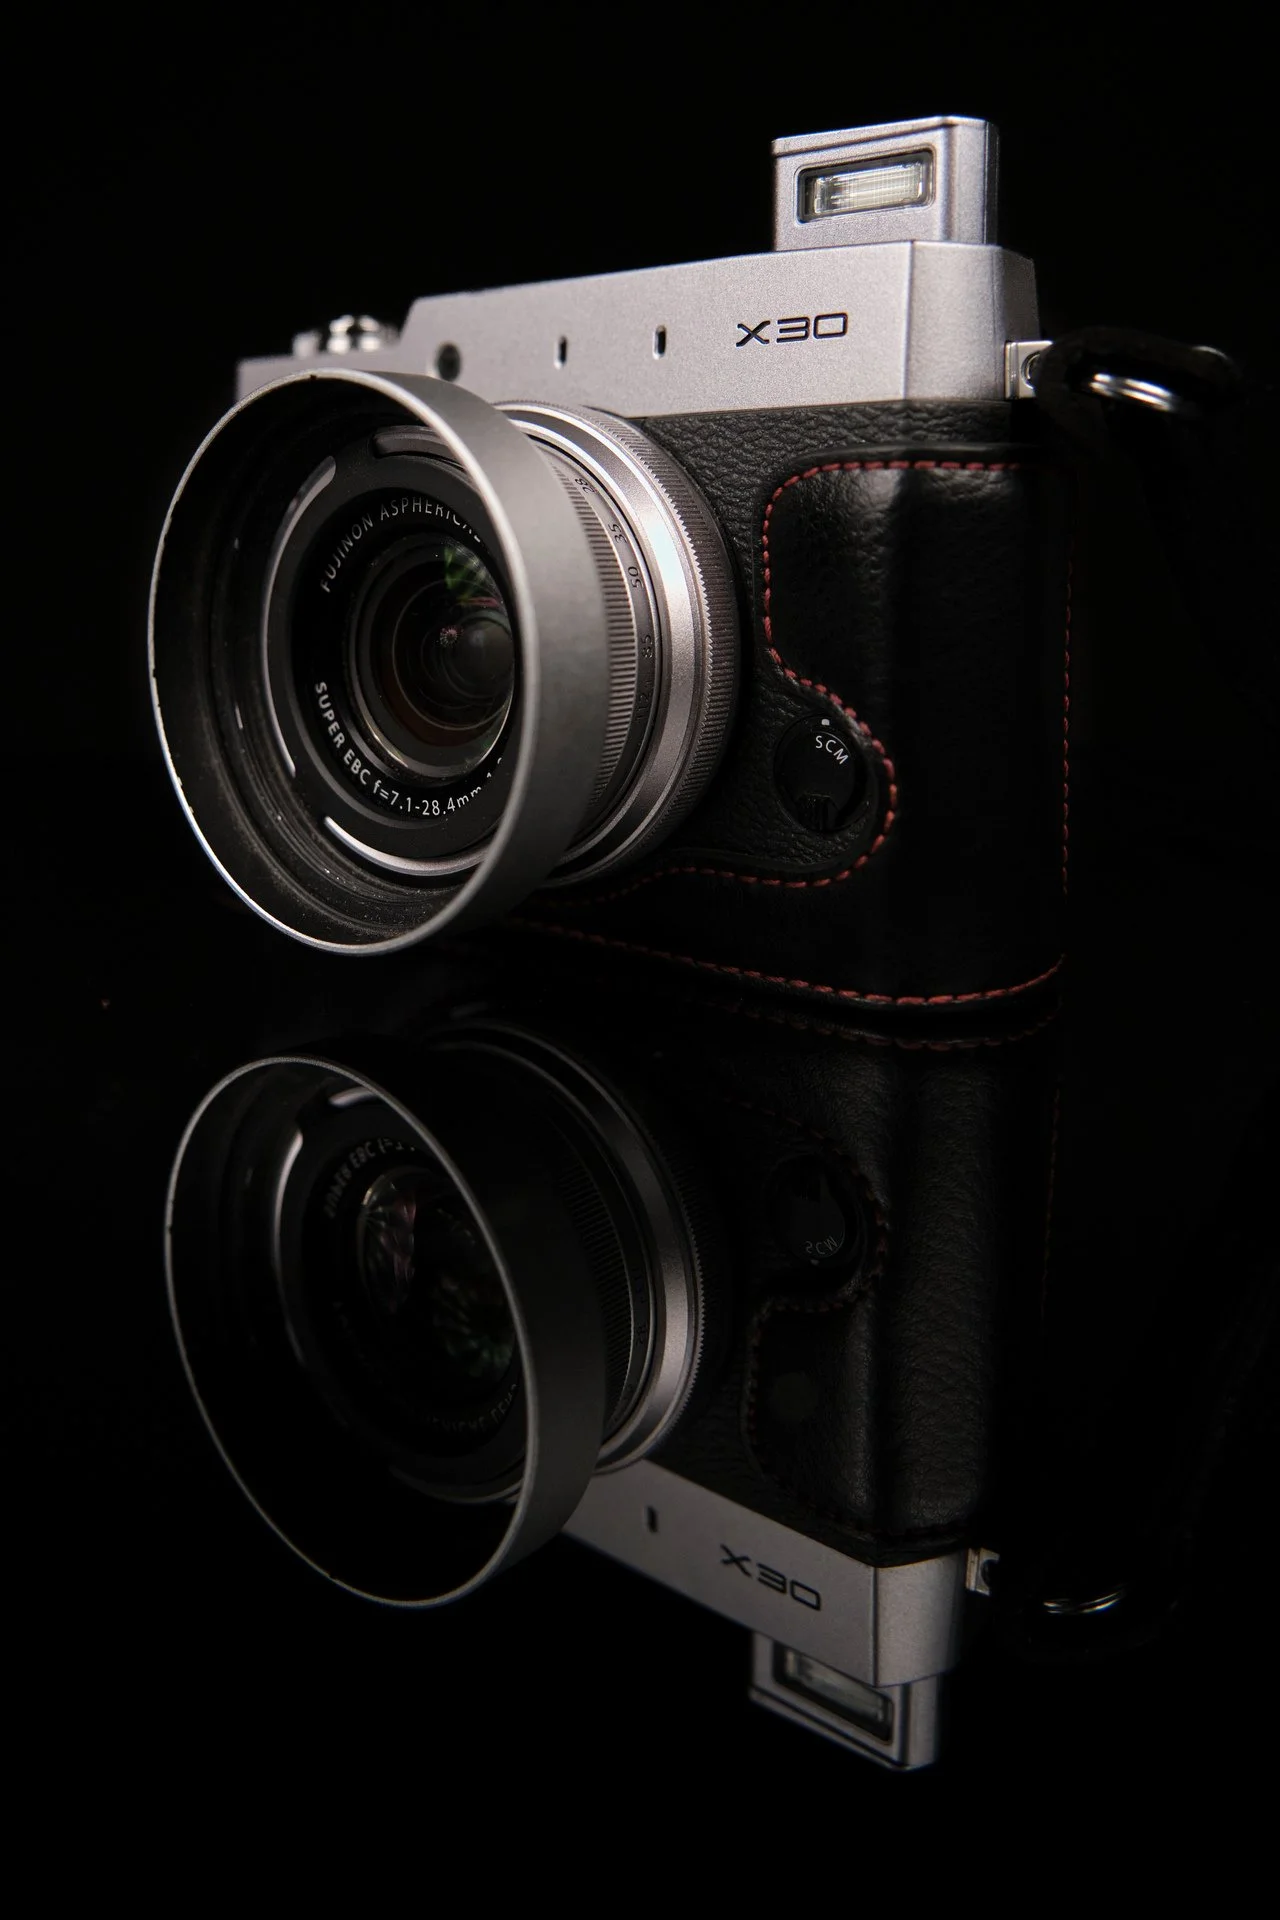
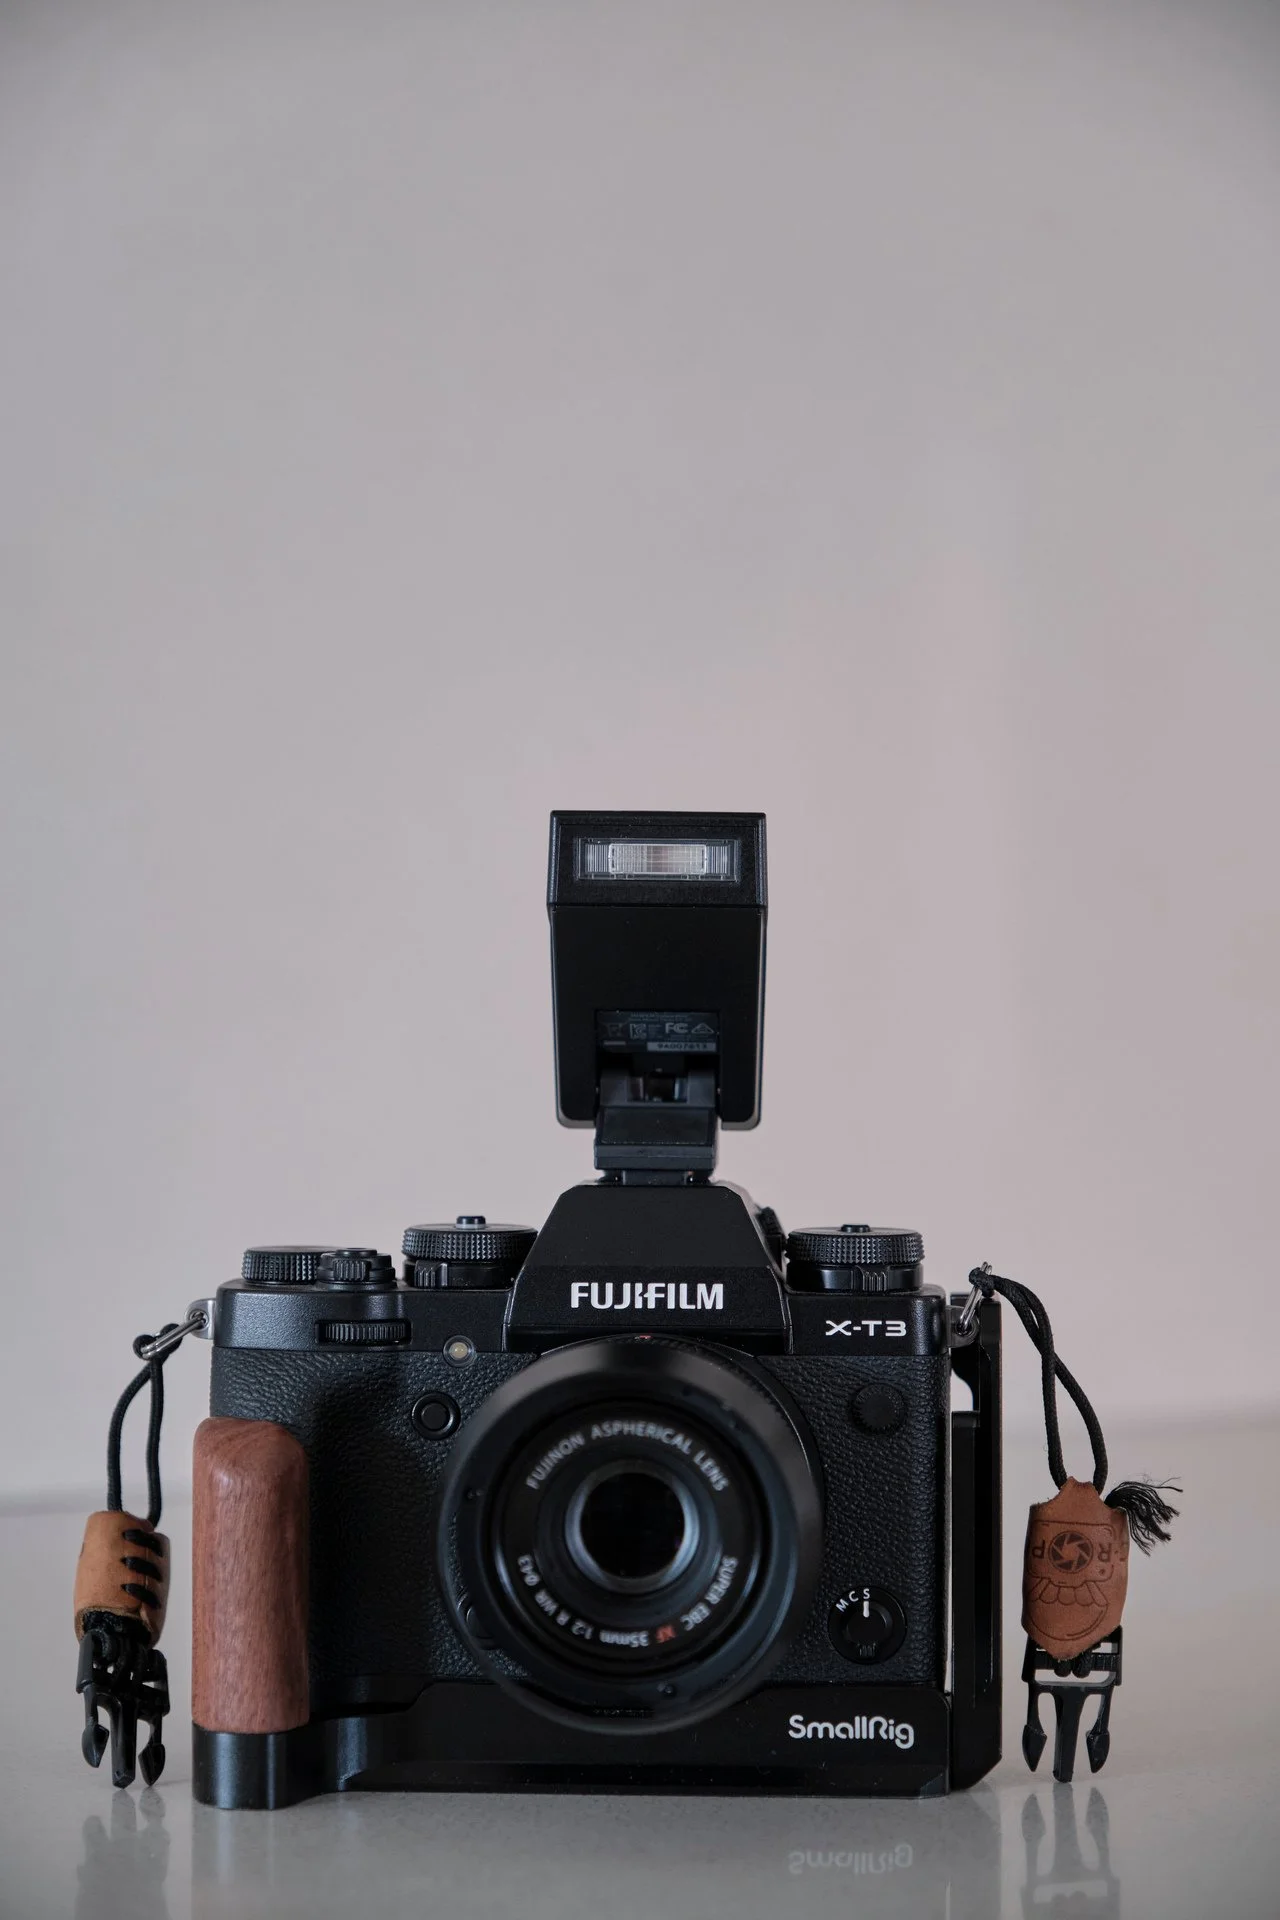
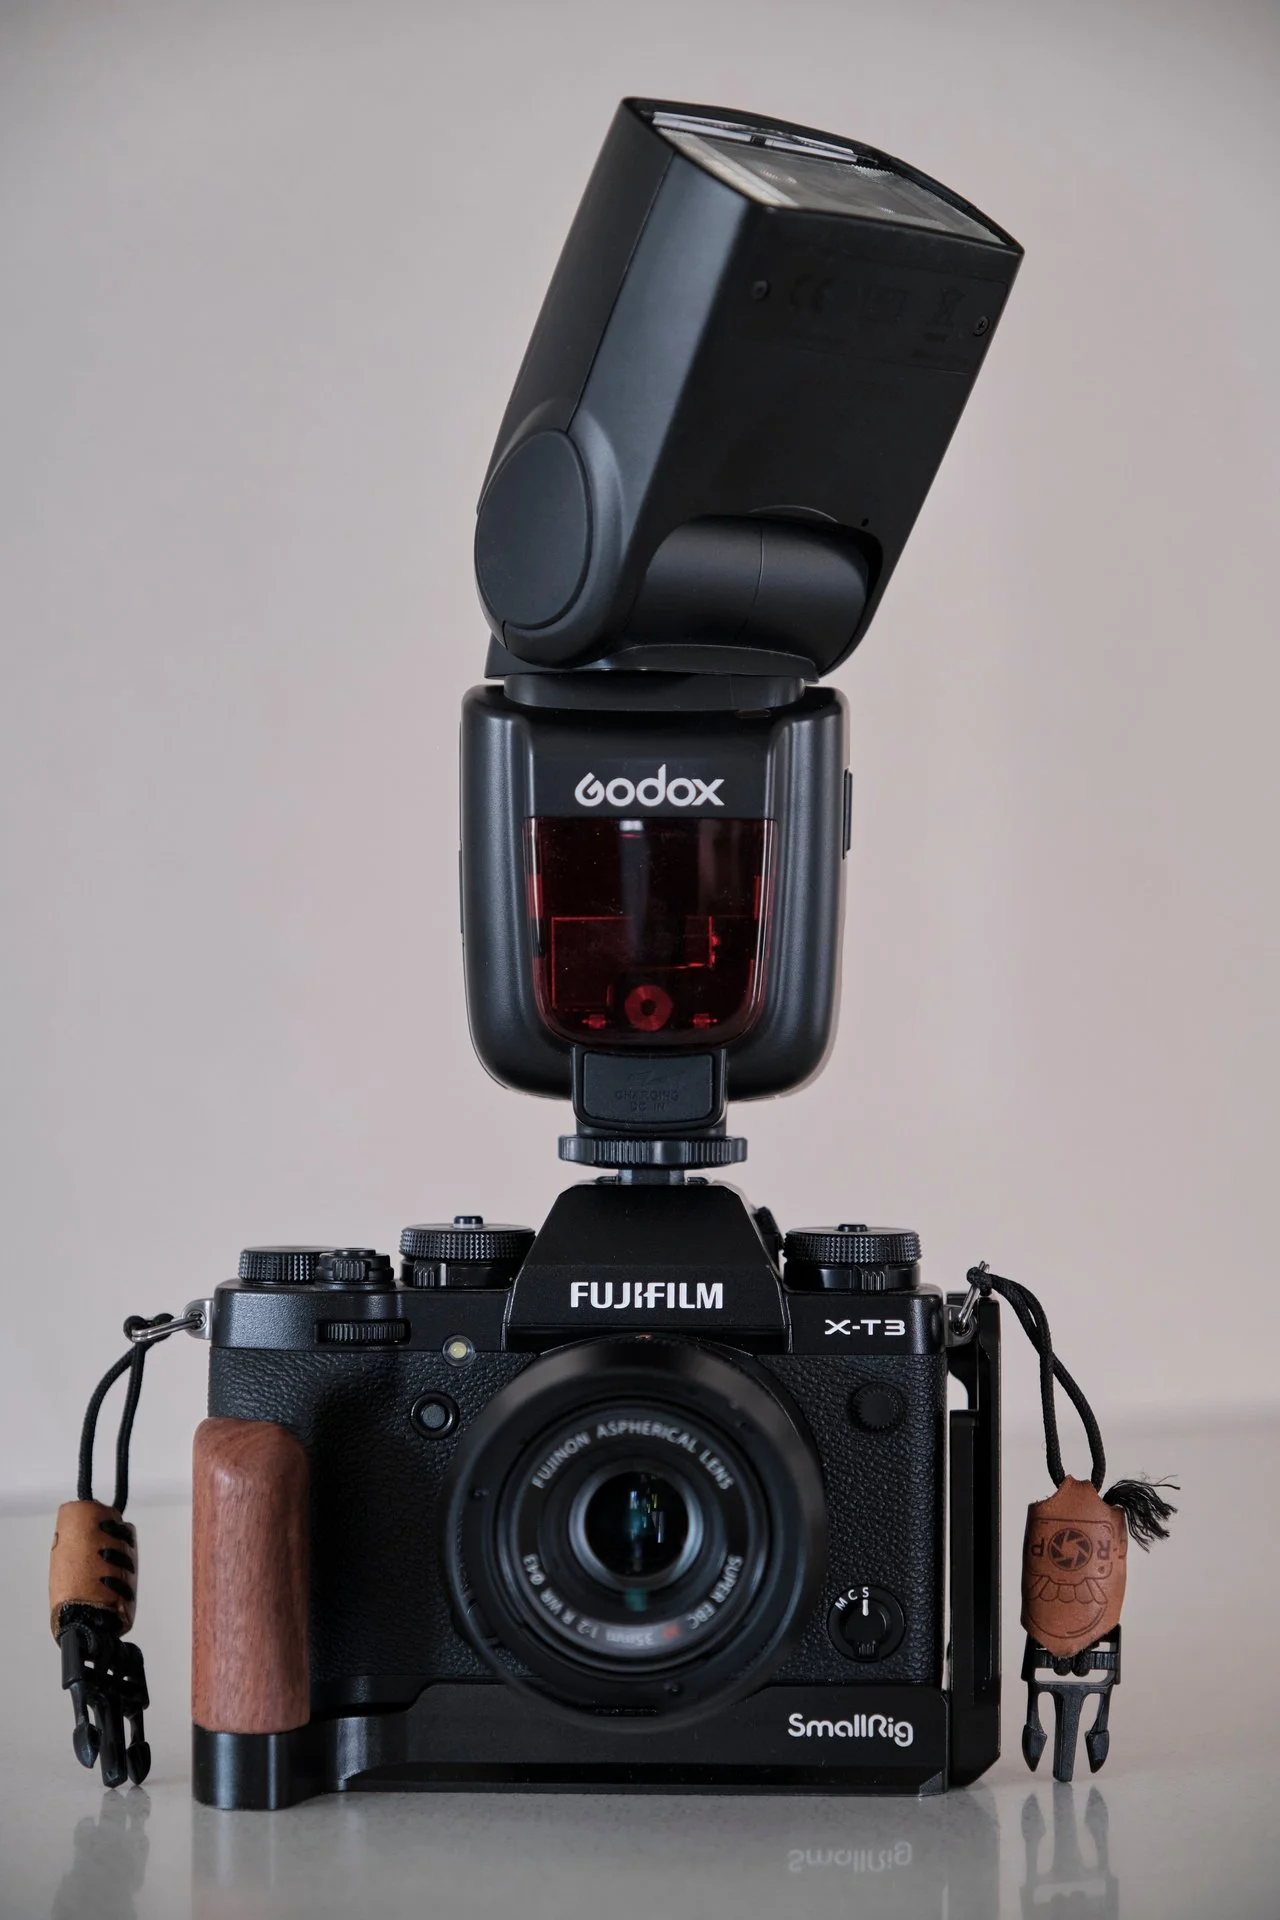
From top to bottom and from left to right:
The built-in flash of the Fujifilm X30. It is relatively low-powered and does not feature a tilting or rotating flash head. However, its main advantage is that it is always available on the camera whenever needed.
The Fujifilm EF-X8 is an extremely compact clip-on flash designed exclusively for selected FUJIFILM X-series mirrorless cameras. Its main advantage is that it draws power directly from the camera body, eliminating the need for its own batteries and keeping the overall setup exceptionally lightweight (just 41 grams). It is relatively low-powered and lacks a rotating flash head, effectively serving as a replacement for the built-in flash on cameras that do not include one.
The Godox TT685 is powered by four AA batteries and incorporates the Godox 2.4G X-System, allowing it to be fully controlled remotely or used as a transmitter for other flash units. It offers significantly greater power than the previous models and features a rotating flash head. The TT685 is available in dedicated versions for different camera systems. The photograph shows the TT685F (Fujifilm) mounted on a Fujifilm X-T3.
The Godox TT685 mounted on a light stand, where it can be triggered via a wireless transmitter. Beside it is the Godox SK400II, an affordable and reliable studio flash with even greater power output. This flash is designed exclusively for use on a light stand and operates only when connected to a mains power supply.
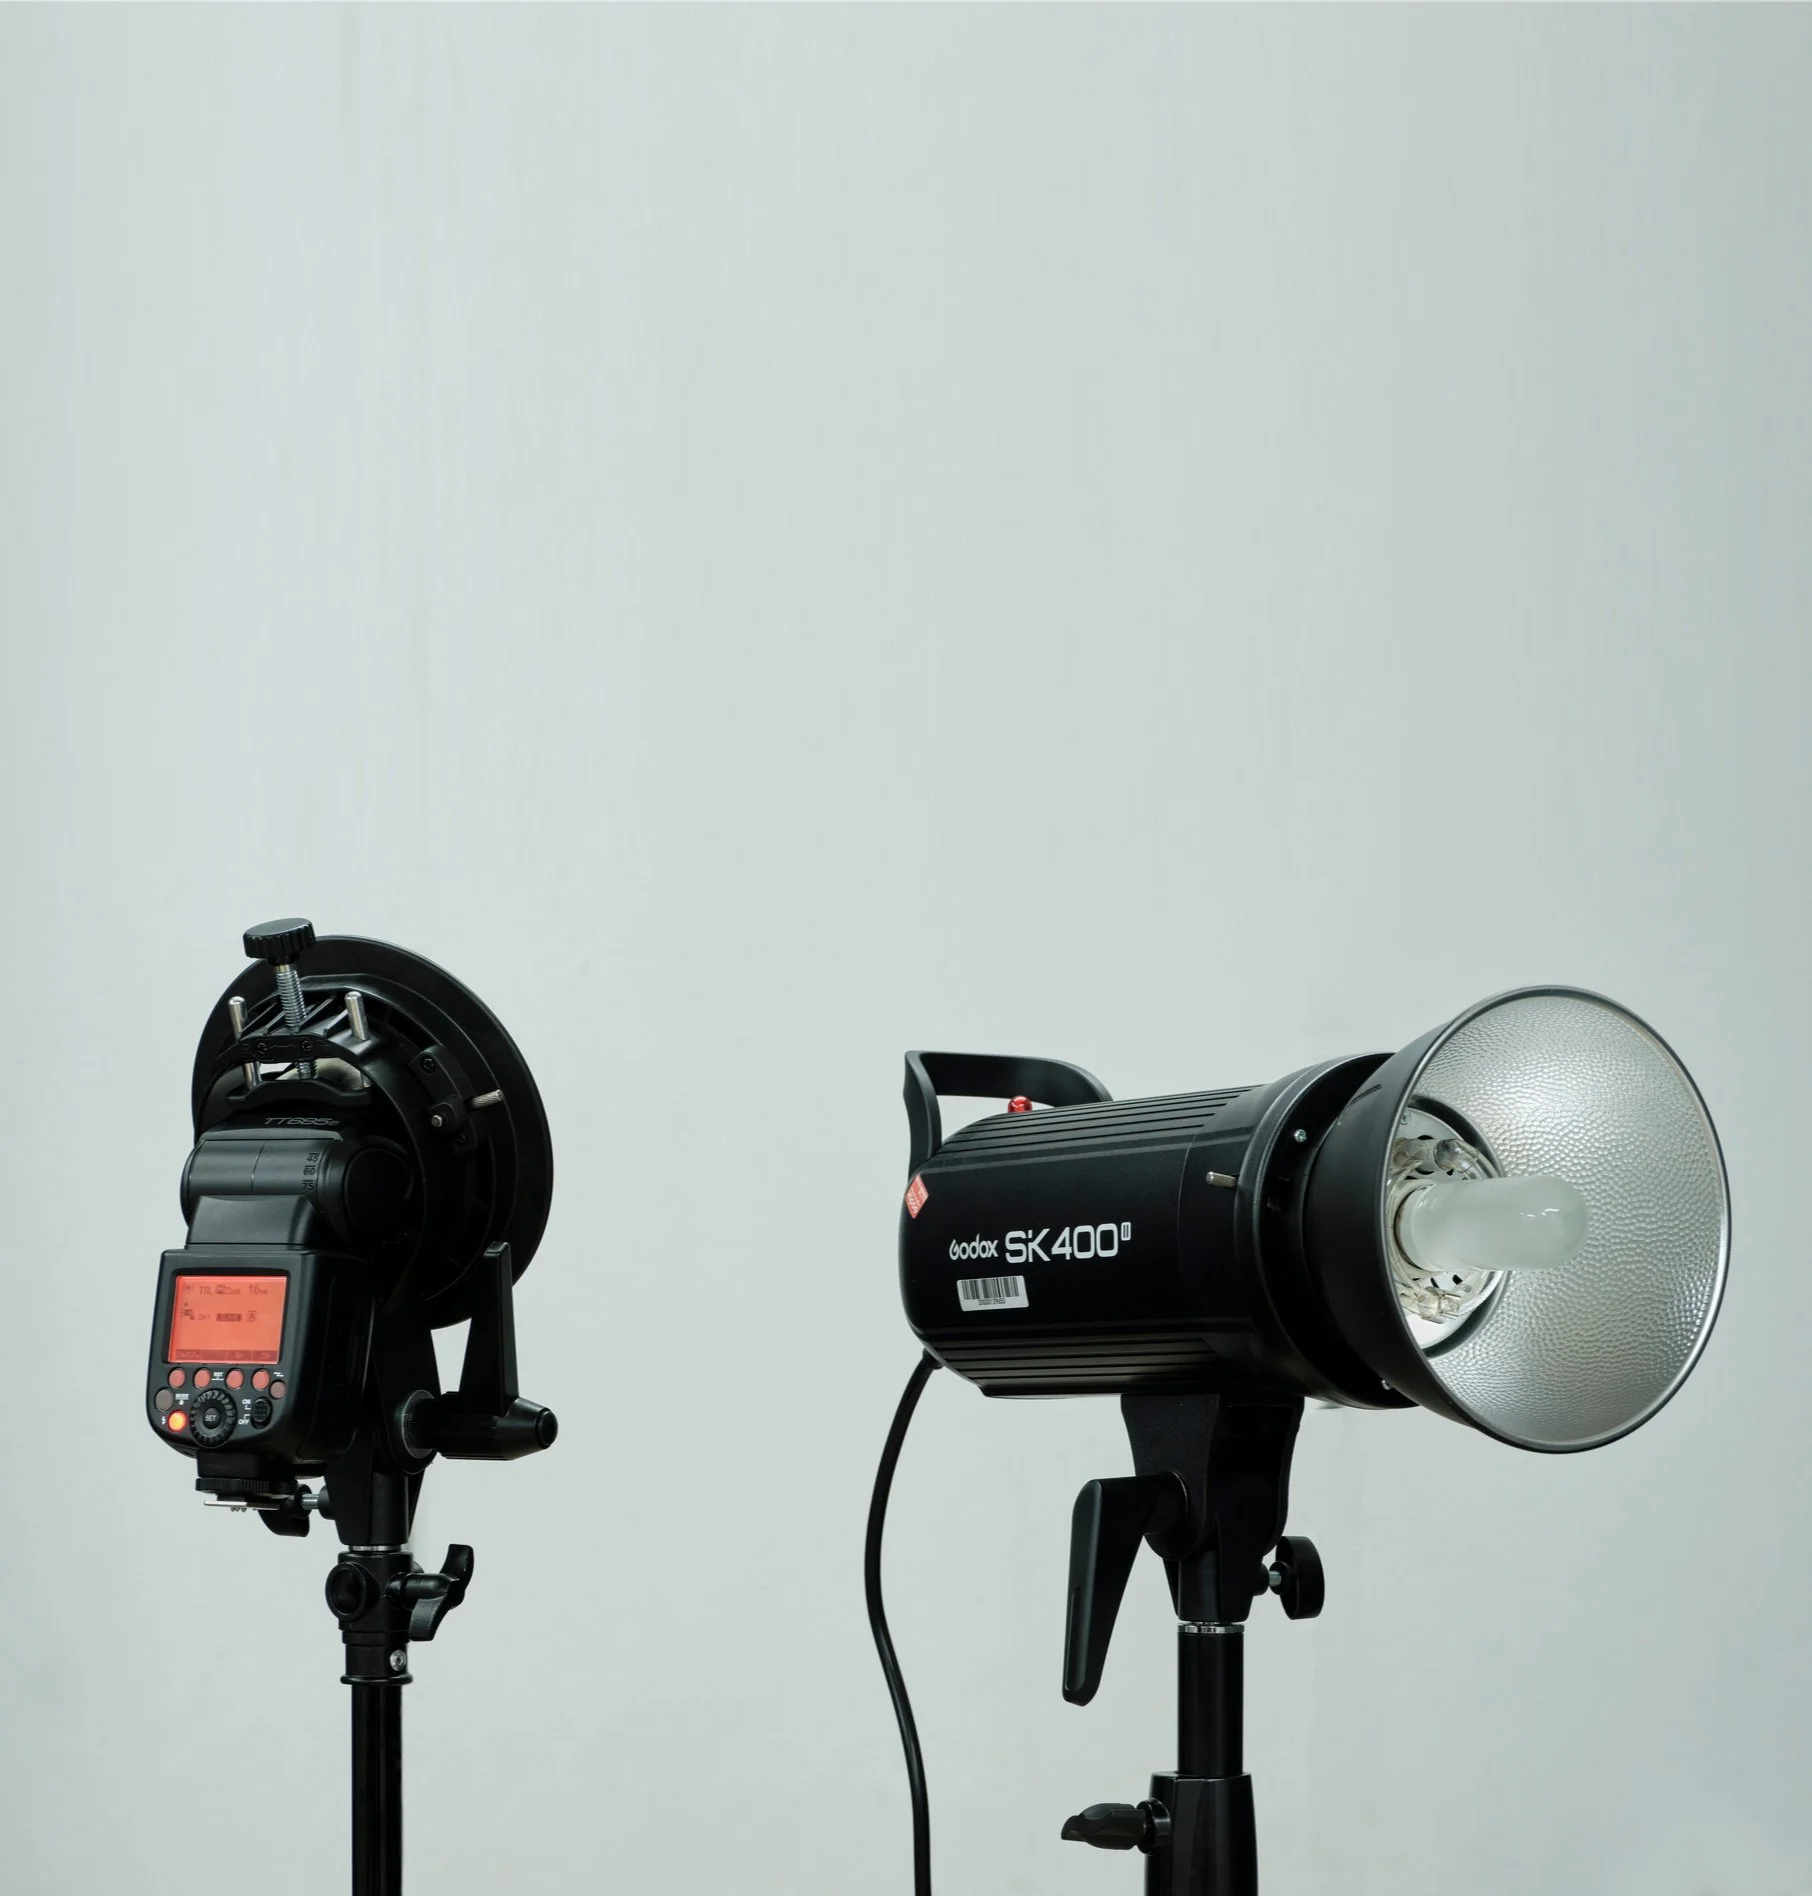
The color temperature of most modern flash units is approximately 5,500 K, which is close to natural daylight. This allows them to produce relatively neutral, “white” illumination and work effectively with a daylight white balance setting.
As we can see, there is a wide range of photographic flash units available, differing considerably in terms of size, capabilities, and cost. Despite these differences, however, their basic operating principle remains the same.
The various functions and technical terms associated with flash photography will be examined in greater detail in the following blog posts. Understanding these concepts will help us choose the right flash for each photographic application and for the specific lighting and shooting conditions we encounter.
What’s their use in photography?
To clear up a common misconception, flash is not used only in dark environments. It is an important tool for controlling and improving the quality of light, regardless of the available lighting conditions.
In low-light situations, flash allows for proper exposure without the need to raise the ISO excessively, thereby maintaining higher image quality and lower levels of noise. In the photograph below, the lighting conditions were so limited that even at an aperture of f/1.4, an ISO of 6400 would have been required to achieve a correct exposure. By using two Godox TT685 flash units, positioned on either side of the model on light stands, the ISO was reduced to 200. At the same time, the model was illuminated symmetrically with soft, even light, highlighting his features without creating harsh shadows.

In outdoor photography, flash can be used as fill light, reducing the harsh shadows created by direct sunlight on the subject’s face. At the same time, it allows the photographer to control the lighting on the subject and the background independently, creating images with greater depth and visual interest.
In the photograph below, a Godox TT685 mounted directly on the camera was used. The model is illuminated slightly more brightly than the background, helping her stand out more clearly within the frame. At the same time, the use of flash eliminates the harsh shadows on her face, resulting in more balanced and flattering lighting.

Thanks to its extremely short flash duration, flash can also freeze fast movement, capturing subjects such as athletes, animals, or water droplets with remarkable sharpness.
In the photograph below, two Godox SK400II studio flashes were used, positioned on either side of the model, each mounted on a light stand and fitted with a 1.80 m reflective umbrella. Although the camera was set to its maximum flash synchronization speed of 1/250 second, it was the extremely short duration of the flash burst that effectively captured the subject.
As a result, the model’s movement was completely “frozen,” creating the impression that she is suspended in mid-air. This example highlights one of the most important advantages of flash photography: its ability to freeze extremely fast movement, even when the camera’s shutter speed is not particularly high.
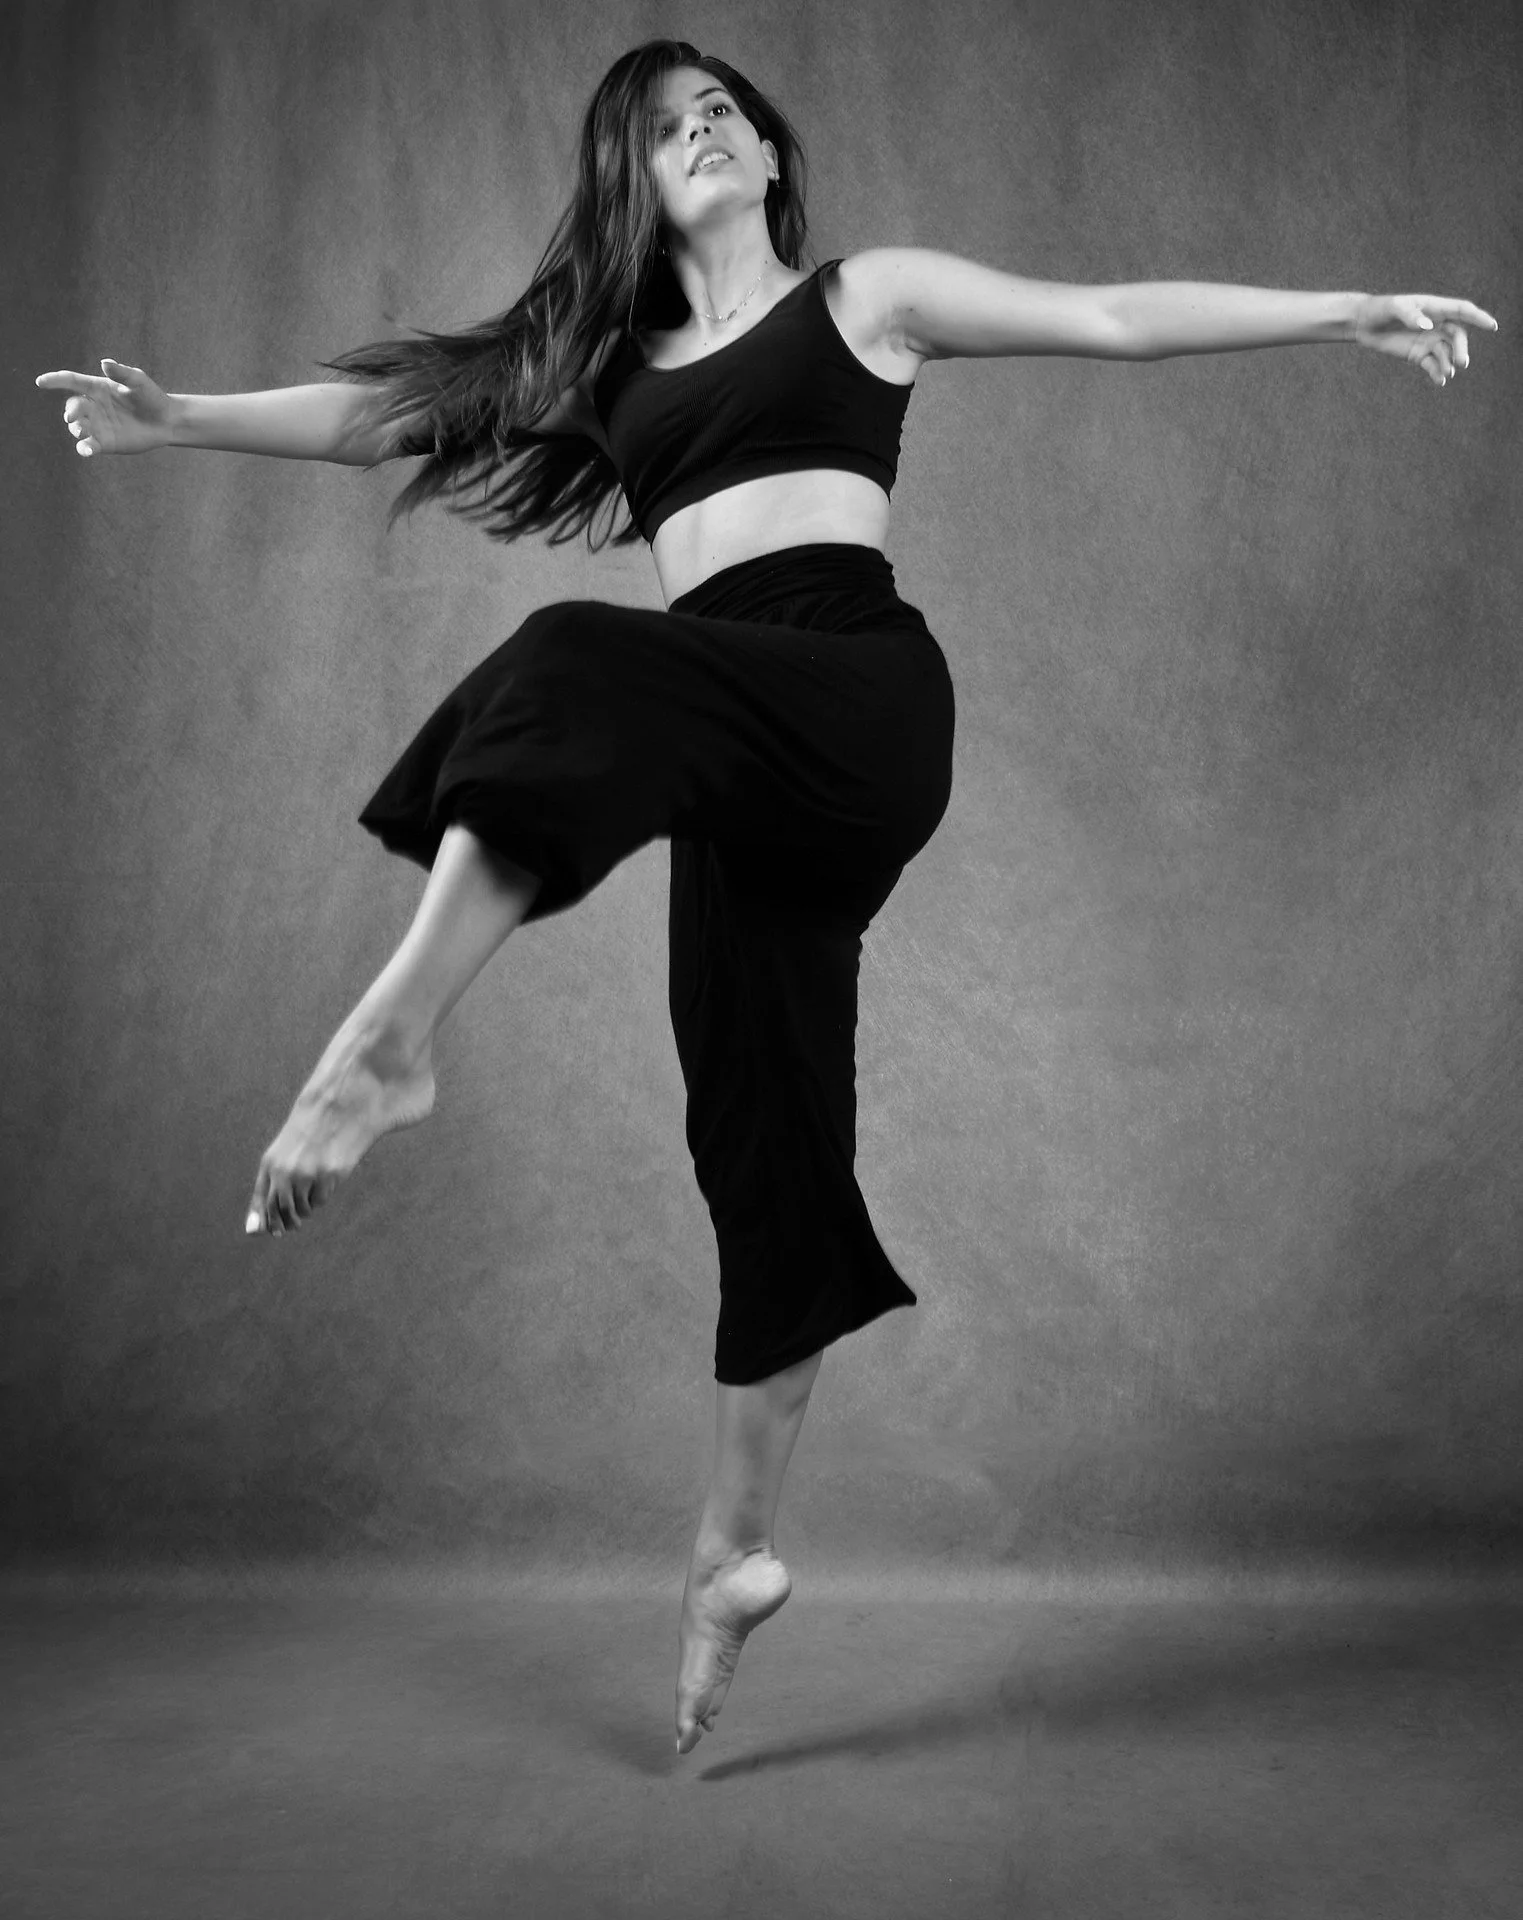
Techniques such as bouncing light off walls or ceilings and using light modifiers can transform flash into a highly creative tool, capable of producing everything from natural, soft illumination to more dramatic and artistic results.
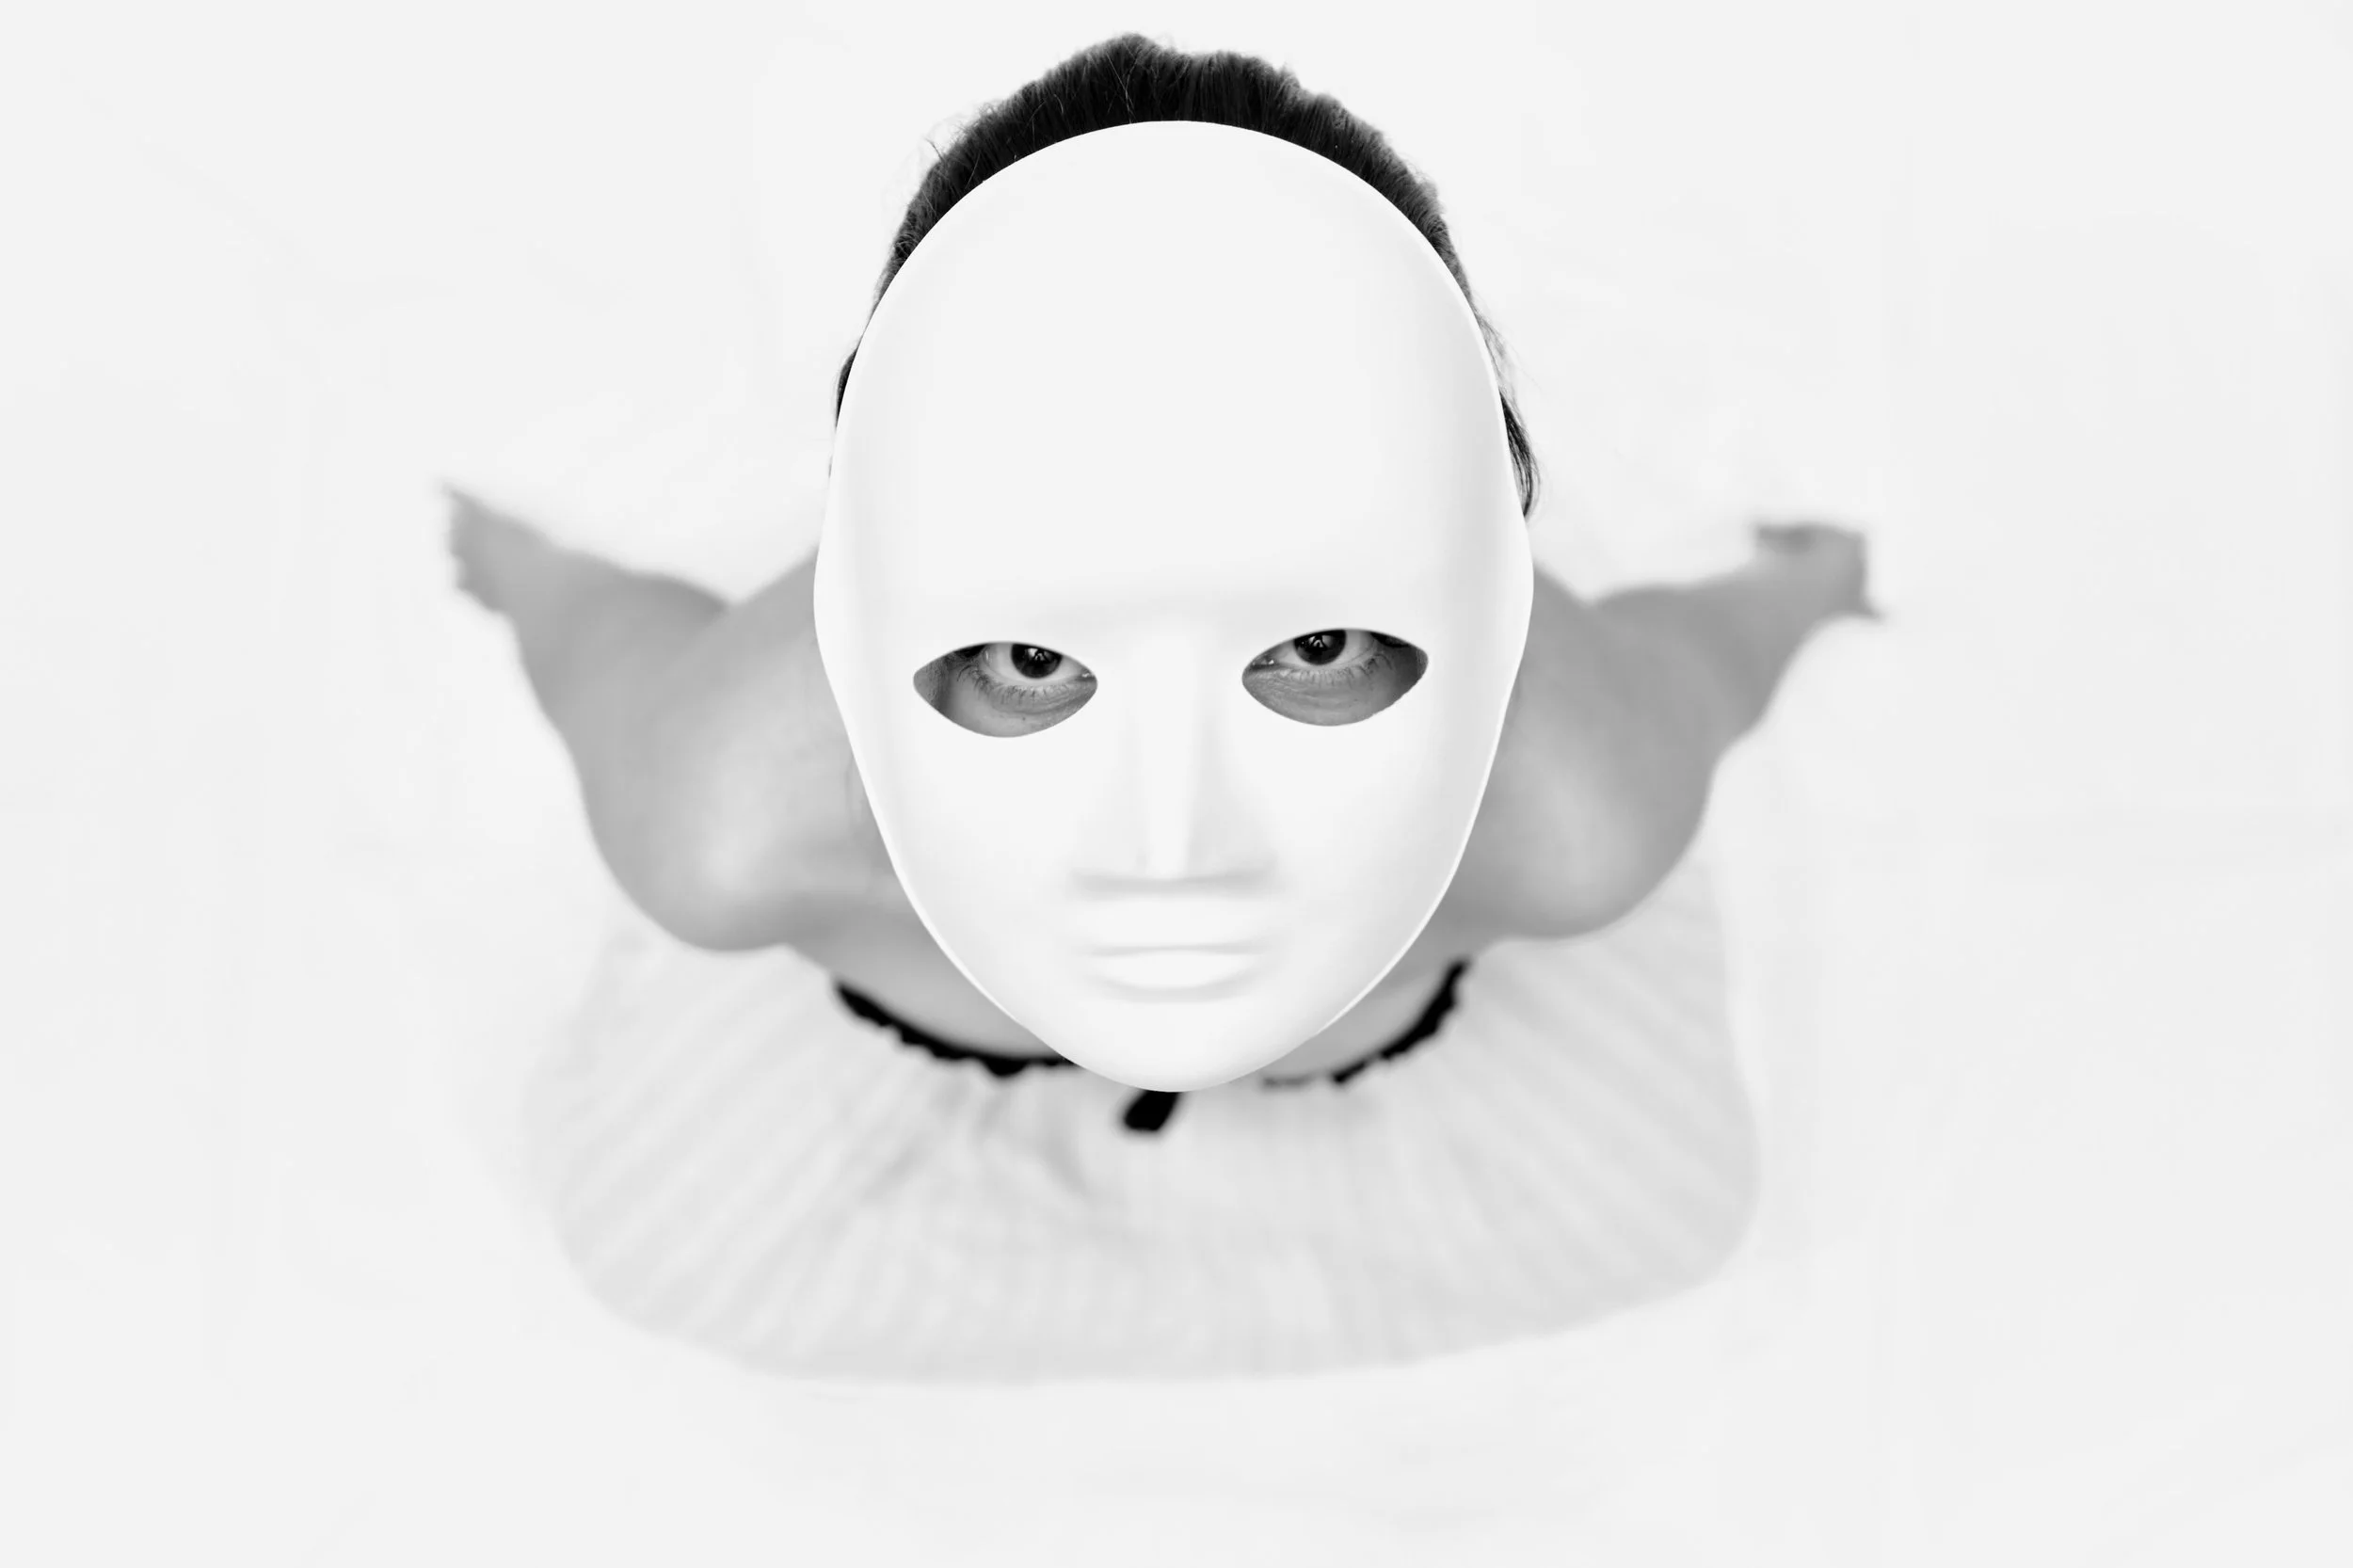
In the photograph below, a Godox TT685 was placed on a light stand, with its flash head aimed toward the ceiling rather than directly at the model. The ceiling acted as a large reflector, diffusing the light and creating broad, even, and soft illumination across the model. In this way, the relatively small light source of the flash was effectively transformed into a much larger light source, resulting in more natural-looking and softer shadows.
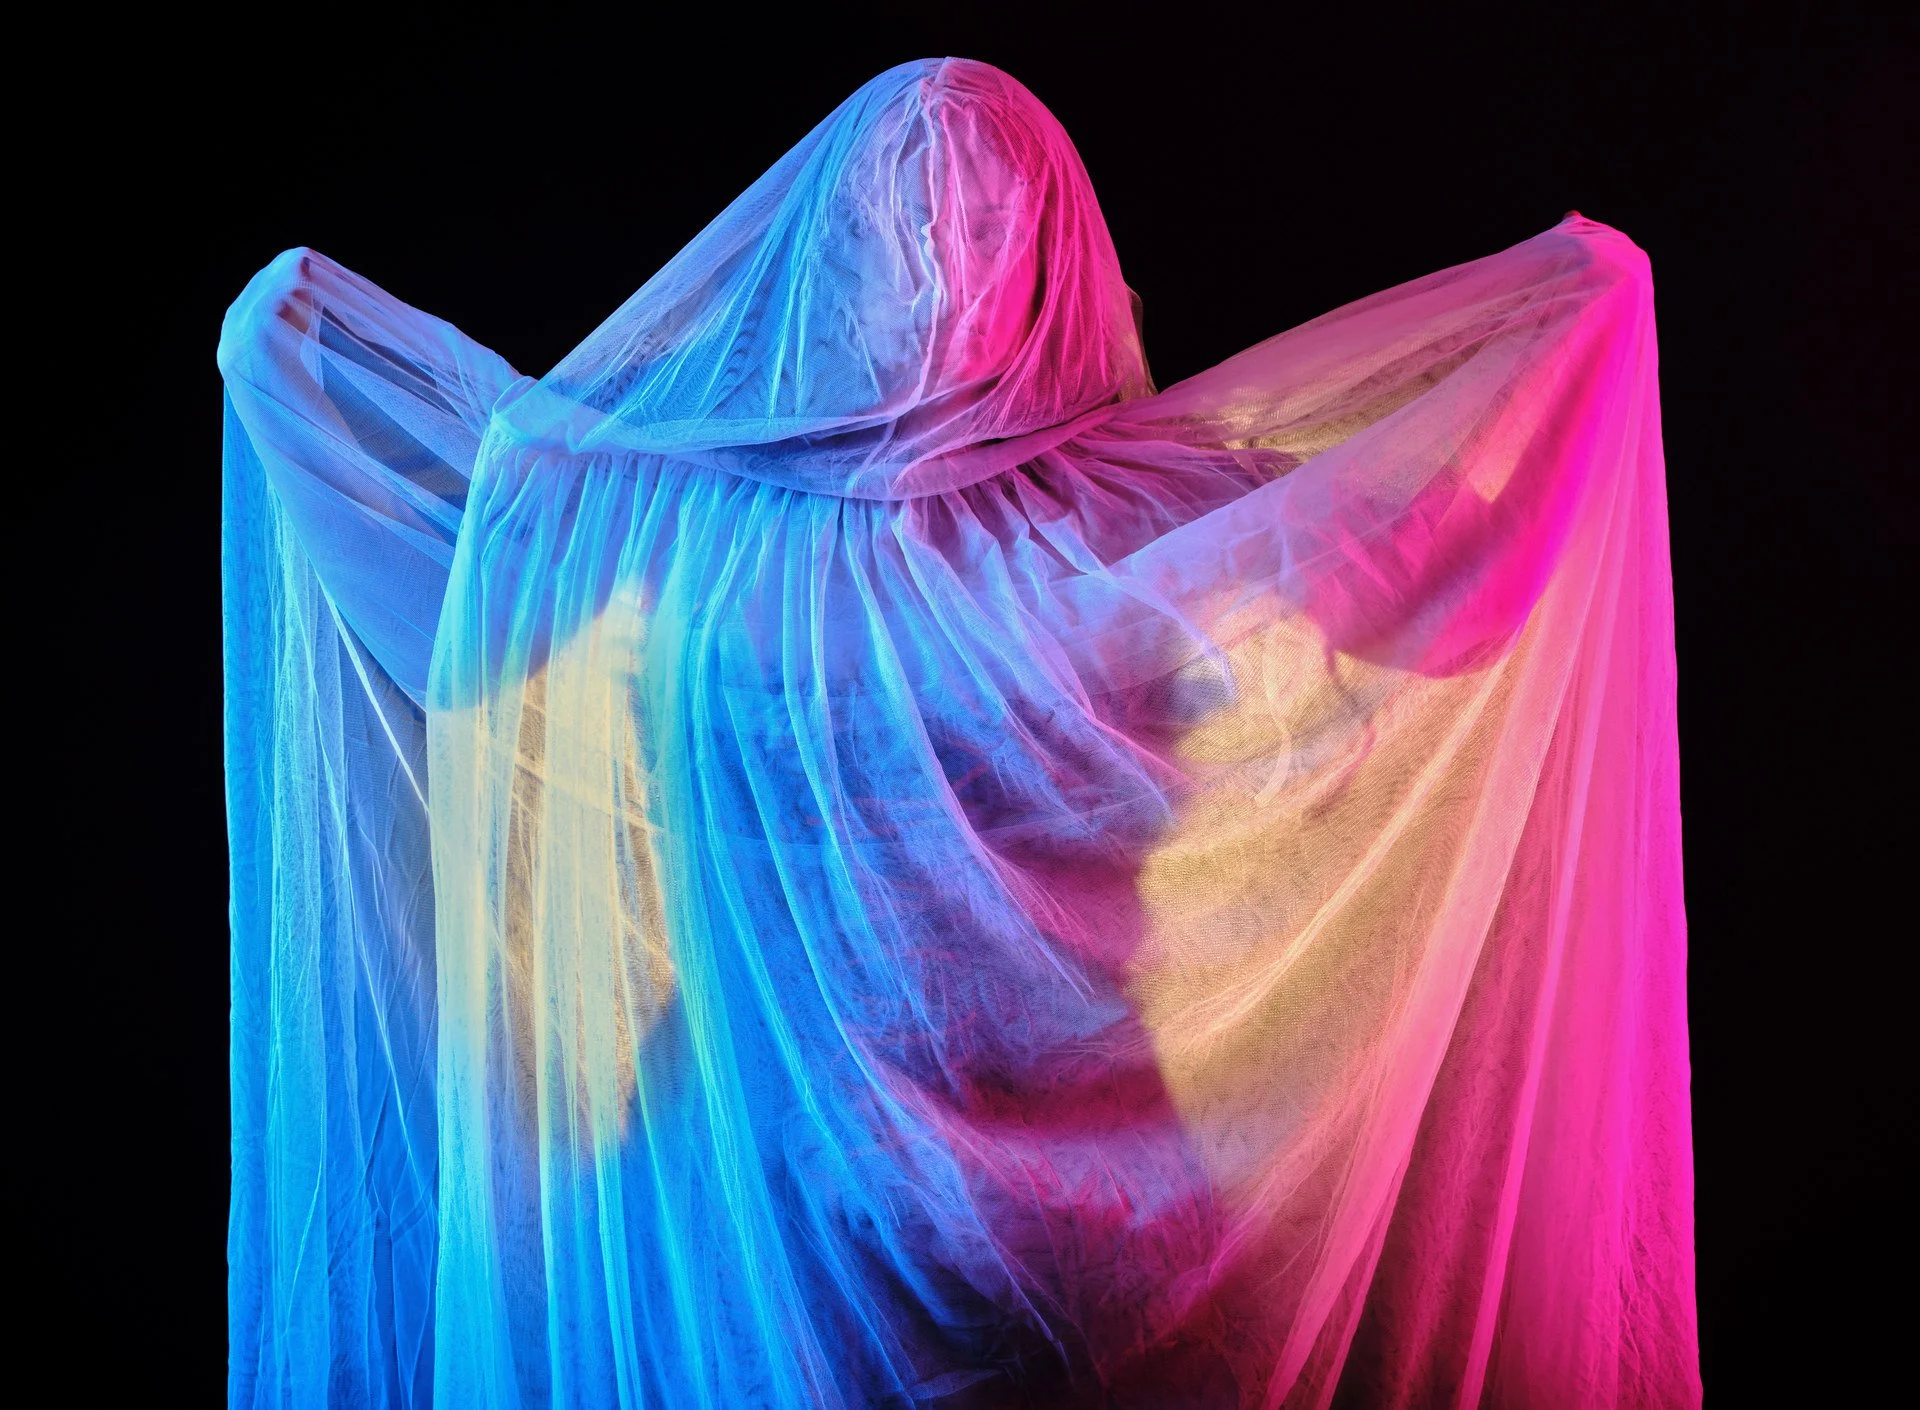
In the photograph below, three flash units were used. Two Godox SK400II studio flashes were positioned on either side of the model on light stands, creating colored rim lighting. The flash on the left was fitted with a translucent blue gel, while the one on the right was fitted with a red one.
A third flash, a Godox TT685, was positioned behind the model, also on a light stand, and fitted with a yellow gel. The combination of the three colored light sources created a distinctive atmosphere, with clearly defined color tones and strong separation between the model and the background.
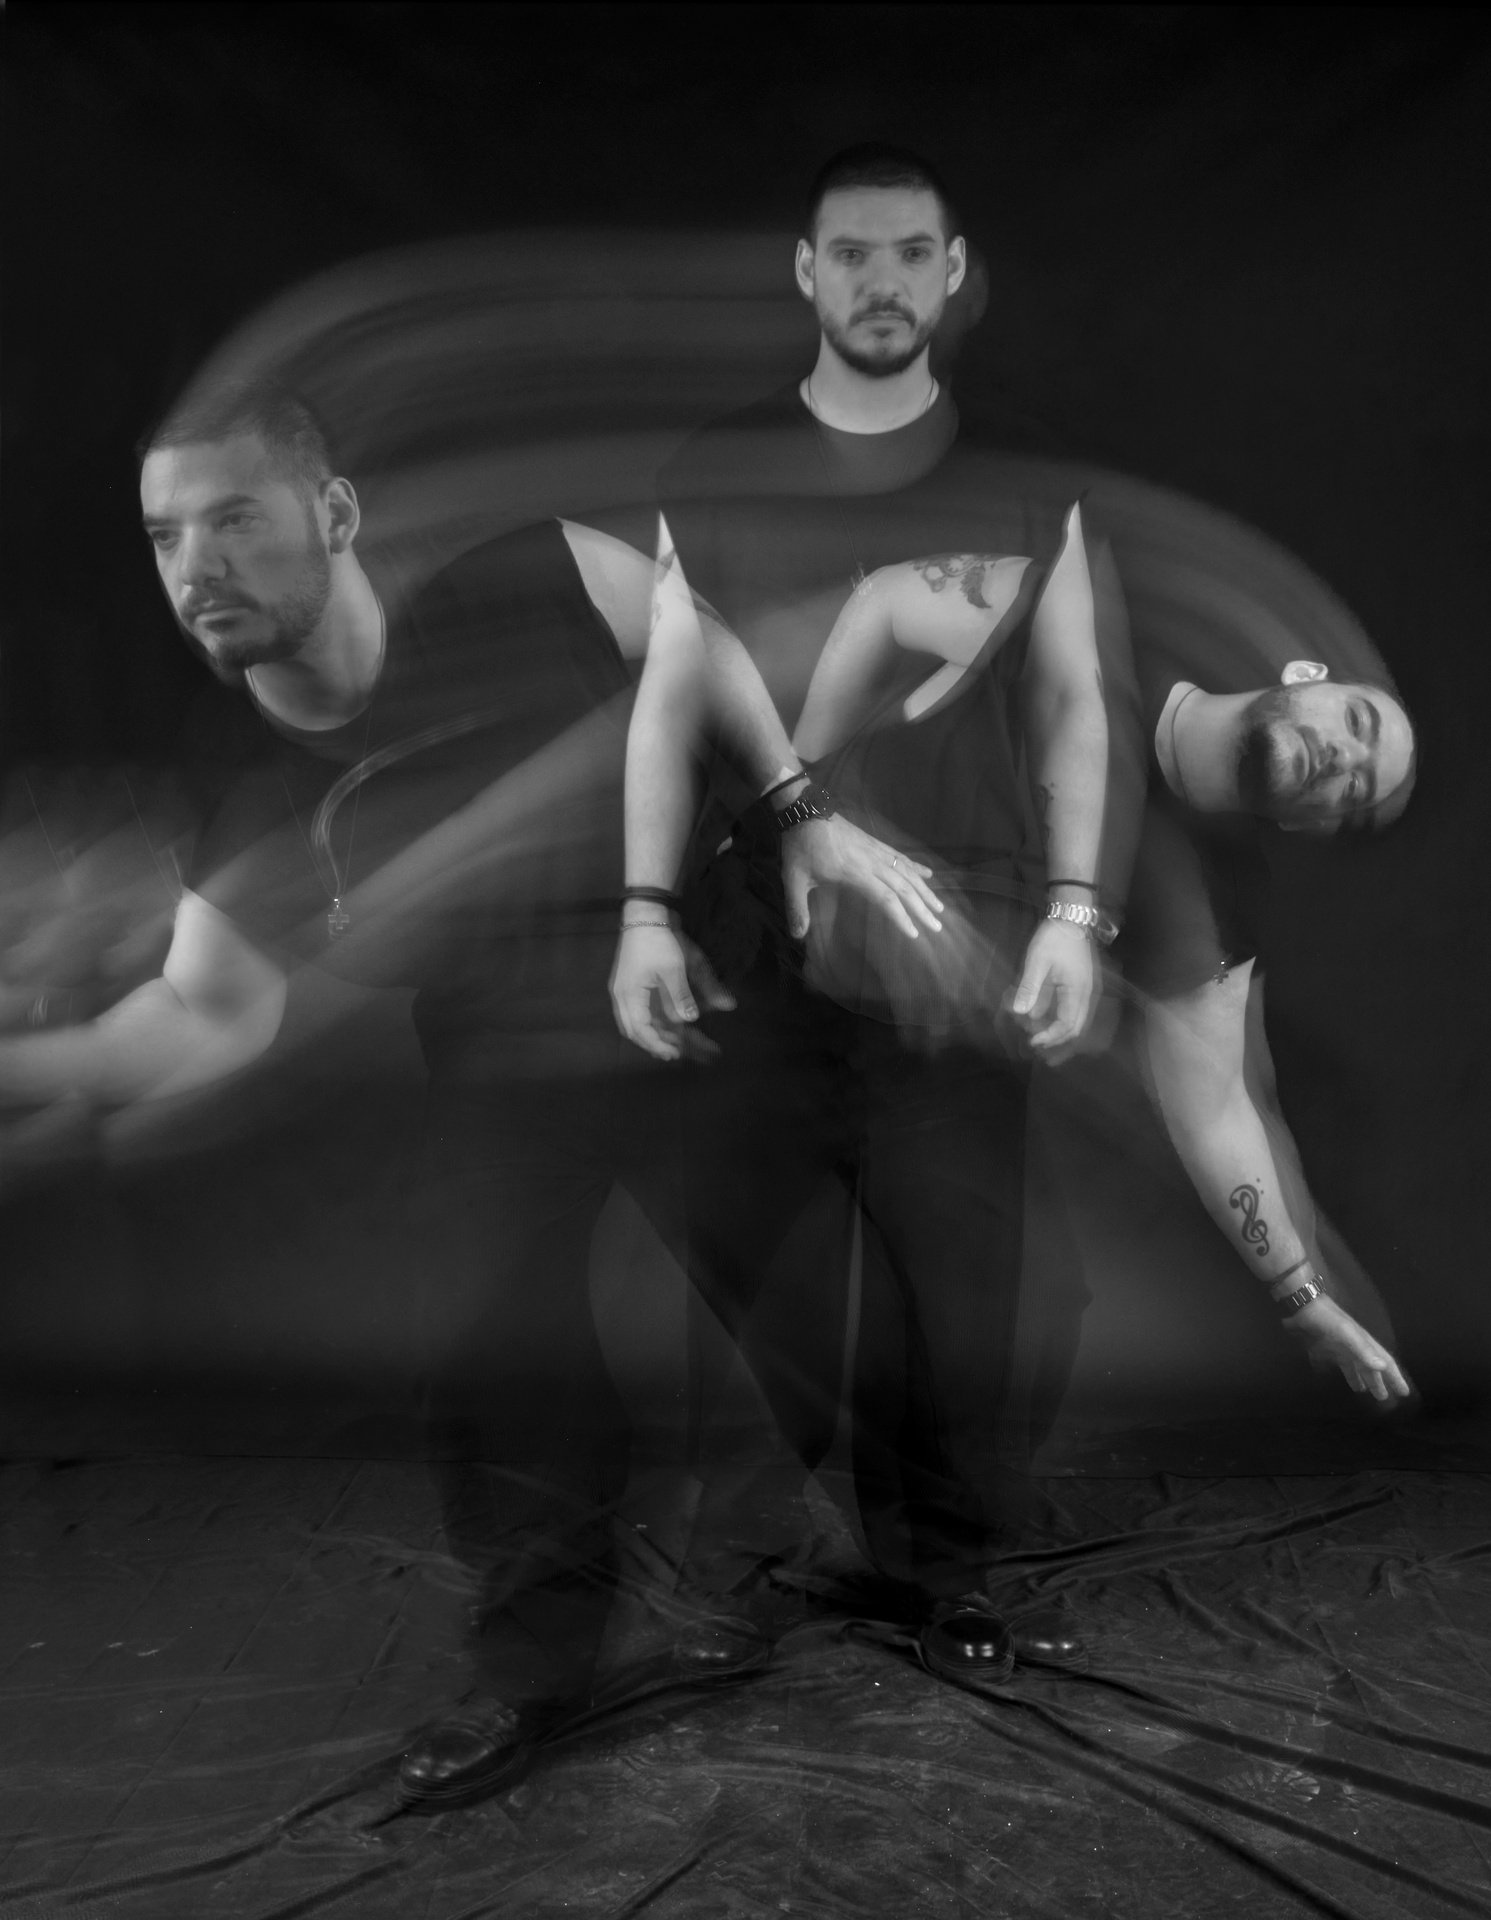
Continuous lighting and flash are not conflicting approaches. On the contrary, there are many situations in which they complement each other and can be used together very effectively. Combining them allows the photographer to take advantage of the different characteristics of each light source, providing greater control and creative flexibility. Mixing continuous light and flash can produce particularly striking photographic results that would be difficult to achieve using either technique alone.
In the photograph below, two Godox SK400II studio flashes were positioned on either side of the model, mounted on light stands. In addition to the flash tube, these units feature an adjustable modeling light, which provides continuous illumination.
First, the exposure was metered using only the modeling lights, with the aim of achieving a 5-second exposure. A separate exposure was then determined for the flash units. Once the appropriate settings had been established, the photograph was taken.
During the 5-second exposure, the flashes were triggered three times at different moments. The extremely short duration of each flash burst “froze” the model’s movement in three distinct positions within the frame. At the same time, the continuous illumination from the modeling lights recorded the movement between these positions throughout the entire exposure, creating light trails and a sense of movement and flow through the scene.
The final result combines the precision and clarity of flash with the dynamic rendering of movement provided by continuous lighting, creating an image that simultaneously captures different moments in time.
Why Flash Photography Can Be Challenging
Flash photography is considered by many to be one of the more demanding areas of photography, as it requires both theoretical knowledge and practical experience.
First, it is essential to understand the basic technical concepts related to how flash works and how it interacts with available light. At the same time, photographers need to explore different flash techniques, such as using flash at night, using it as fill flash during the day, or incorporating it into indoor photography.
Theory, however, is not enough. Effective use of flash requires consistent practice, whether with the help of a model or through carefully arranged still-life setups. During the early stages of learning, unsuccessful photographs are often more numerous than successful ones, making patience and persistence essential to a photographer’s progress.
Choosing the right equipment also requires research. The market offers a wide range of flash units with different capabilities and price points, making it important to identify your actual needs and establish a realistic budget.
Finally, flash photography can become a relatively expensive pursuit. In addition to the flash itself, various accessories are often required, such as wireless triggers, light modifiers, umbrellas, softboxes, and, in some cases, external light meters. Although more affordable options from third-party manufacturers are now widely available, the overall cost can still represent a significant investment for many amateur and emerging professional photographers.
Conclusion
Flash units are powerful tools that give photographers the ability to control and shape light in ways that are often impossible to achieve using natural or continuous lighting alone. Understanding and using them effectively requires theoretical knowledge, experimentation, and plenty of practical experience. At the same time, exploring flash photography involves a financial investment in the equipment required.
However, the investment of time, effort, and resources is undoubtedly worthwhile. Learning how to use flash can literally open up new creative possibilities, expand a photographer’s visual repertoire, and provide greater freedom to bring creative ideas to life.
This blog post, together with the series of articles that will follow, aims to provide the fundamental knowledge, practical guidance, and useful advice needed to help readers become familiar with the world of photographic lighting, making this journey as smooth, rewarding, and enjoyable as possible.